This guide walks you through a journal submission from start to finish. Submitting to a conference is almost identical – see How to submit a conference paper for the differences.
Before you start
- Register and log in. See Register and manage your account.
- Choose the right journal. Open Journals in the main menu and read the aims and scope of each journal. Not sure? Click Not sure? Let Ava choose the journal for your paper on the Journals page, or paste your title and abstract into the chat with Ava (see Using Ava & Adam).
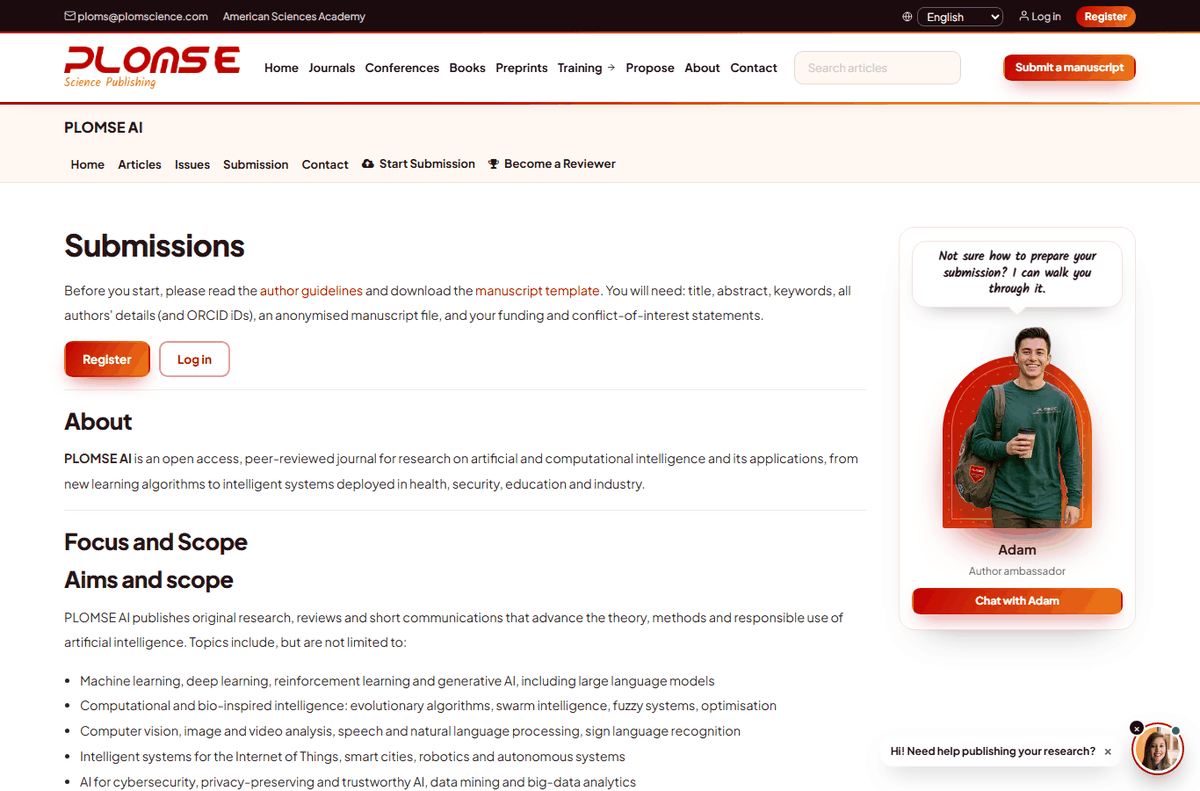
- Read the journal's Submissions page. Every journal has a Submissions page (in the journal menu, address
/<journal code>/submissions/) with the author guidelines, the licences the journal uses, its sections (article types), any fees and the author templates. - Use the author template. Download the Word (or LaTeX, where offered) template for your journal from its Submissions page and write or paste your manuscript into it. A manuscript in the journal template is easier to review and moves faster through production.
- Prepare your files: the manuscript (Word
.docxpreferred; PDF is accepted for review), figures as separate high-resolution image files if possible, and any data or supplementary files. If the journal uses anonymous review, remove your names and affiliations from the manuscript file. - Have ready: the title, abstract, keywords, the names, emails and affiliations of all co-authors (with their ORCID iDs if they have one), funding information and a short cover letter for the editor.
Step 0 – Start the submission
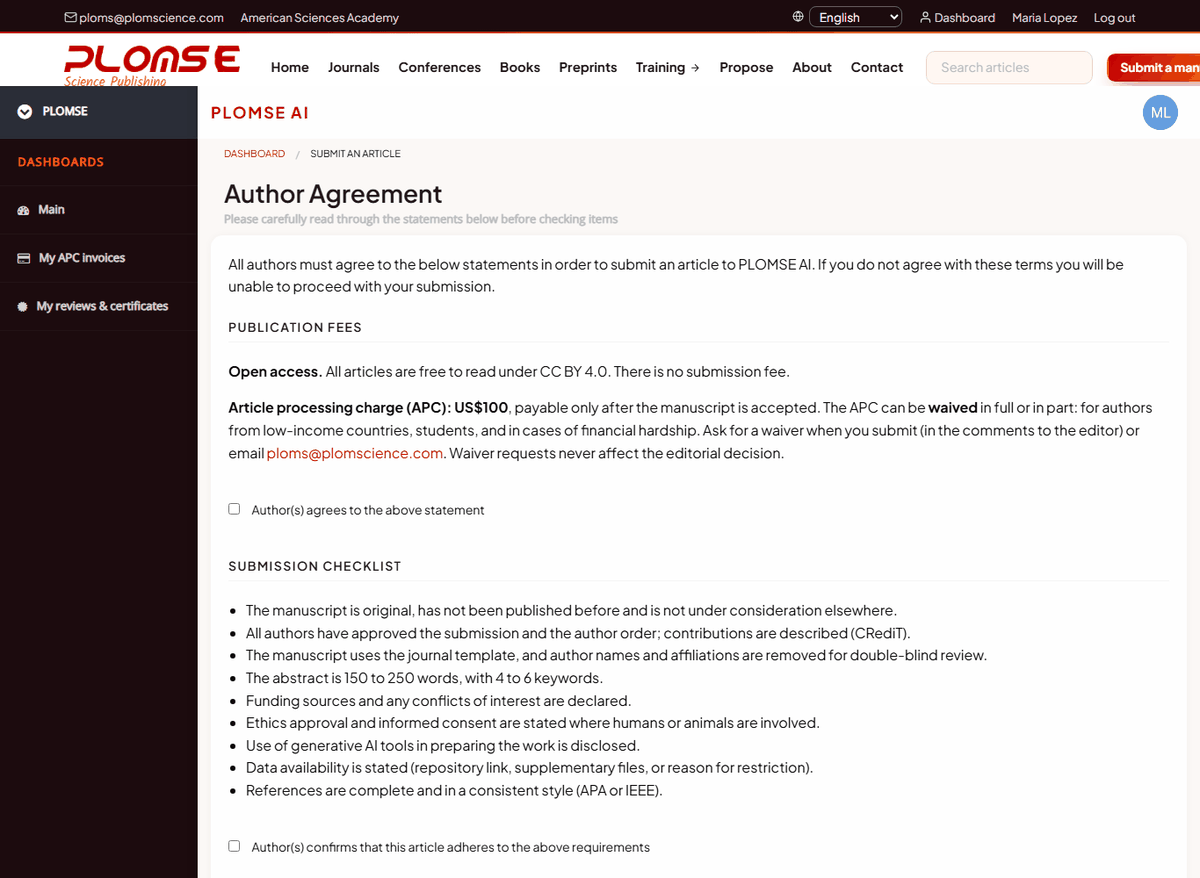
On the journal's home or Submissions page click Submit a manuscript (header) or Start Submission. You arrive on the Author Agreement page.
- Read each statement and tick the boxes that appear (for example the Submission Checklist, Copyright Notice and, if the journal charges one, the Publication Fees statement).
- Declare any Competing Interests in the box (or write "None").
- Click Start Submission.
Step 1 – Article information
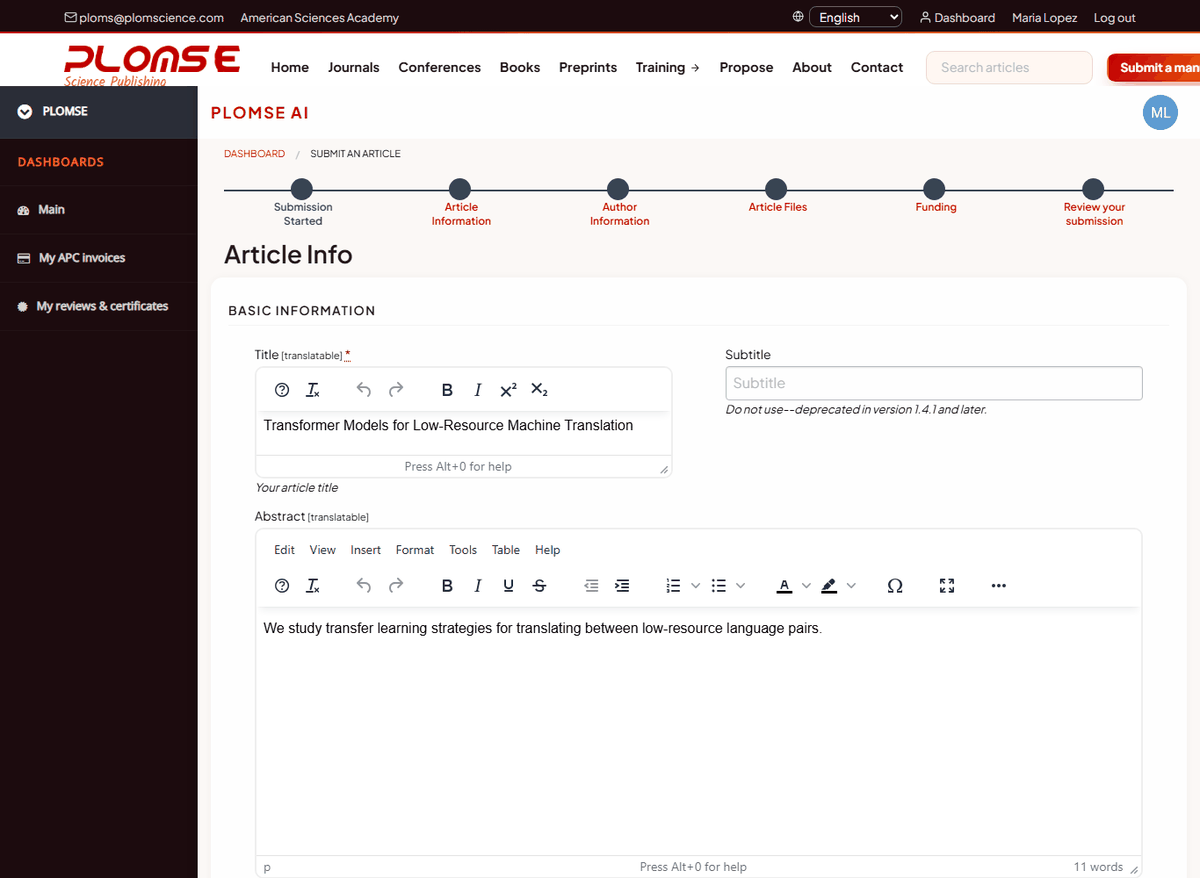
Fill in the Article Info page:
- Title (and subtitle if the journal uses one);
- Abstract – paste plain text; you can use the editor's basic formatting;
- Language of the article;
- Section – the article type (Research Article, Review, Short Communication, etc.);
- Licence – click View license information to read the options; PLOMSE journals normally use Creative Commons Attribution (CC BY 4.0);
- Keywords – type a keyword and press Enter after each one;
- any additional questions the journal asks.
Click Save and Continue.
Step 2 – Authors
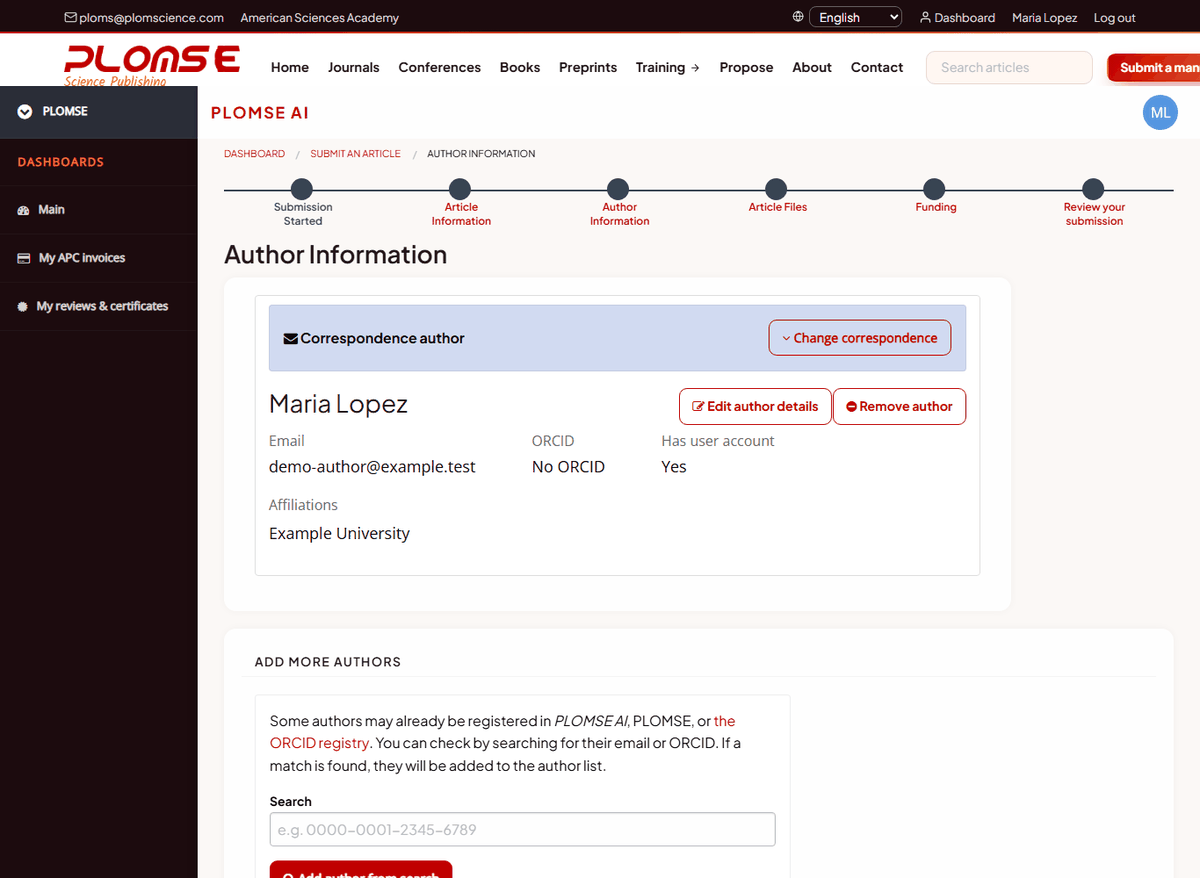
The submitting author is the corresponding author by default.
- Click Add Self as Author if you are an author of the paper (most people are).
- To add a co-author, type their email address or ORCID iD in the search box and click Search. If they already have a PLOMSE account or an ORCID record, click Add author from search.
- If they are not found, click Add author manually and enter their name, email, affiliation and ORCID iD.
- Use the arrows to put authors in the correct order and the edit icon to correct details. Choose the correspondence author if it is not you.
When the list is complete, click Save and continue.
Co-authors do not need an account
Co-authors added manually do not have to register. They will receive emails about the submission only if the journal is set up to notify them.
Step 3 – Files
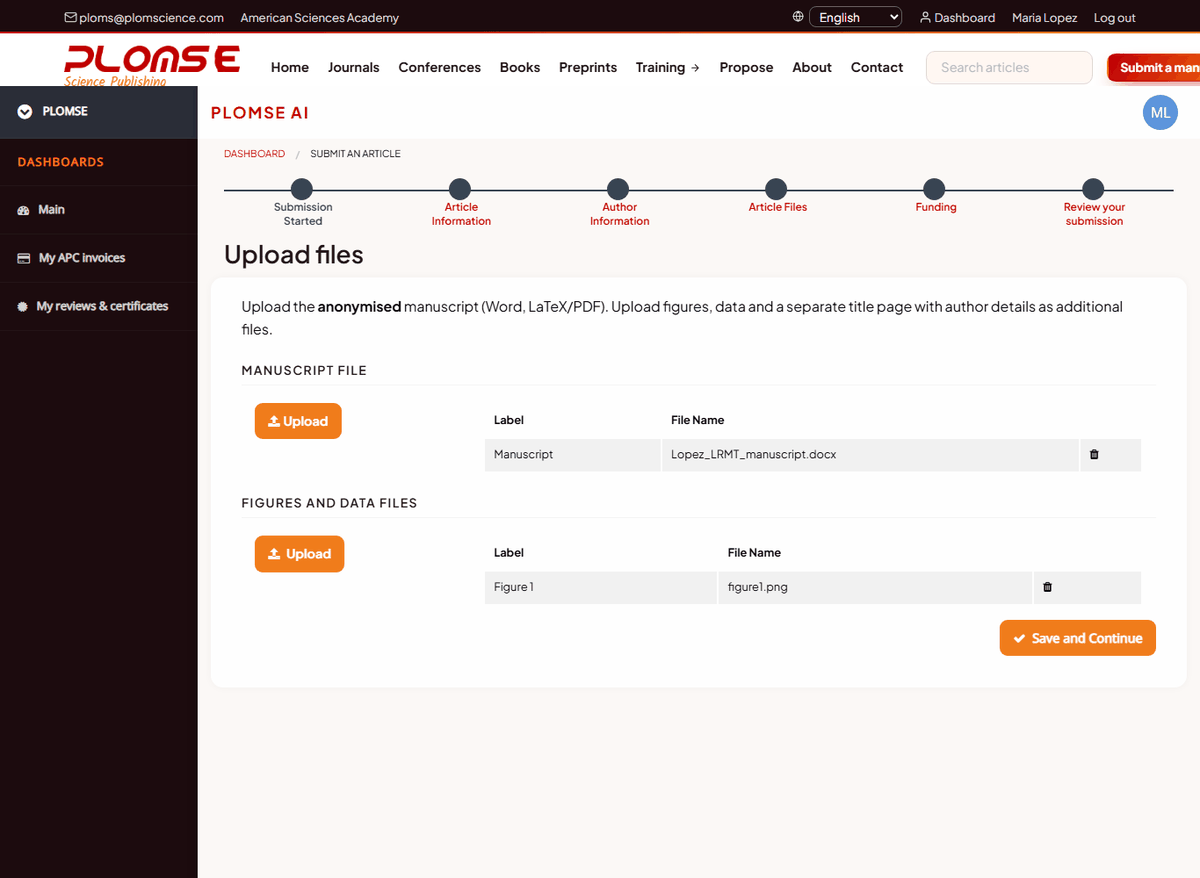
On Upload files:
- In the manuscript section click Upload, choose your manuscript file, give it a label (for example "Manuscript") and upload it. Upload exactly one manuscript file.
- In Figures and Data Files click Upload for each figure, table, dataset or supplementary file, with a clear label ("Figure 1", "Dataset S1").
- Uploaded files appear in the table. Use the bin icon to delete a wrong file and upload it again.
Click Save and Continue. If the journal asks for funding information you then see a Funding Information page: search for your funder (from the Crossref funder registry) or click Add funder manually, add the grant number and save.
Step 4 – Review and submit
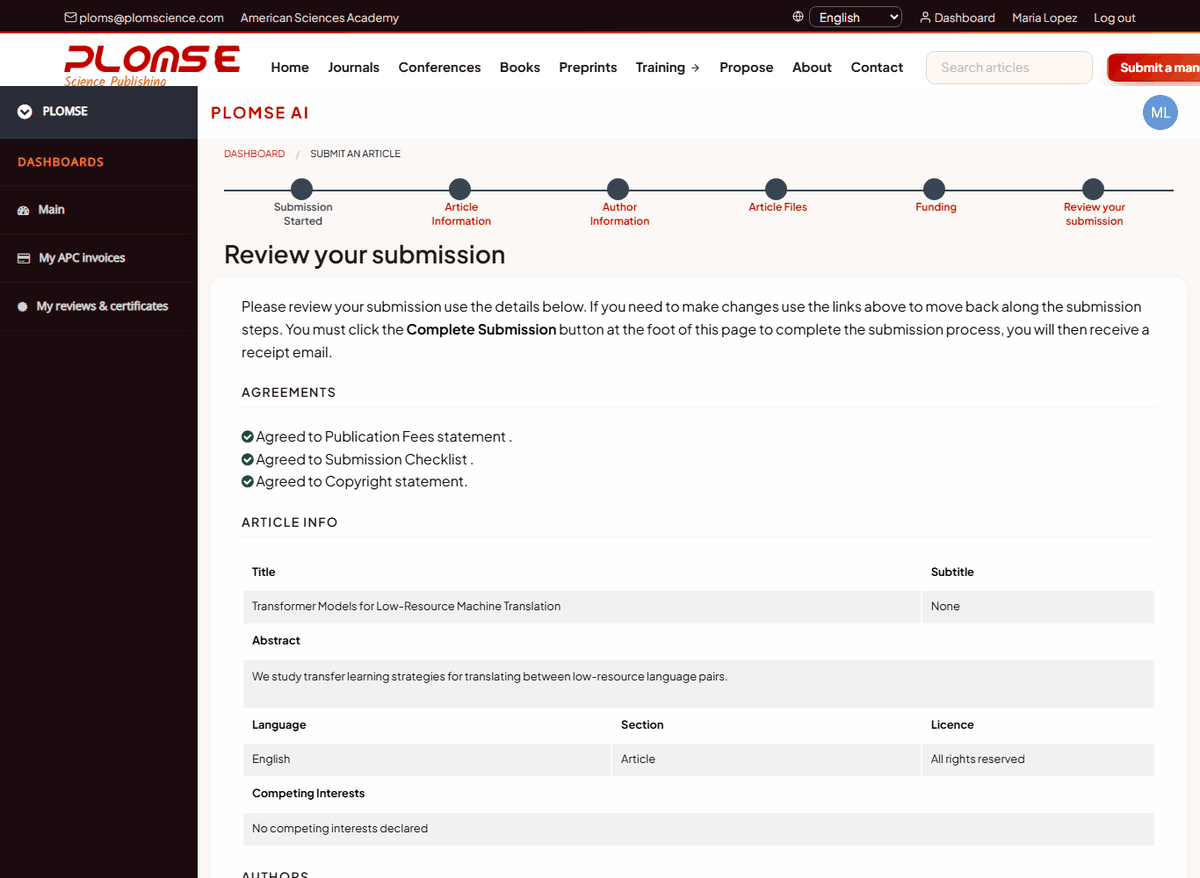
The Review your submission page summarises everything you entered: agreements, article information, authors and files. Check it carefully – you can go back to any step with the links at the top. You may add Comments to the Editor (only the editor sees them).
Click Complete Submission. That is it: you receive a confirmation email, and the editorial office is notified.
Unfinished submissions are saved
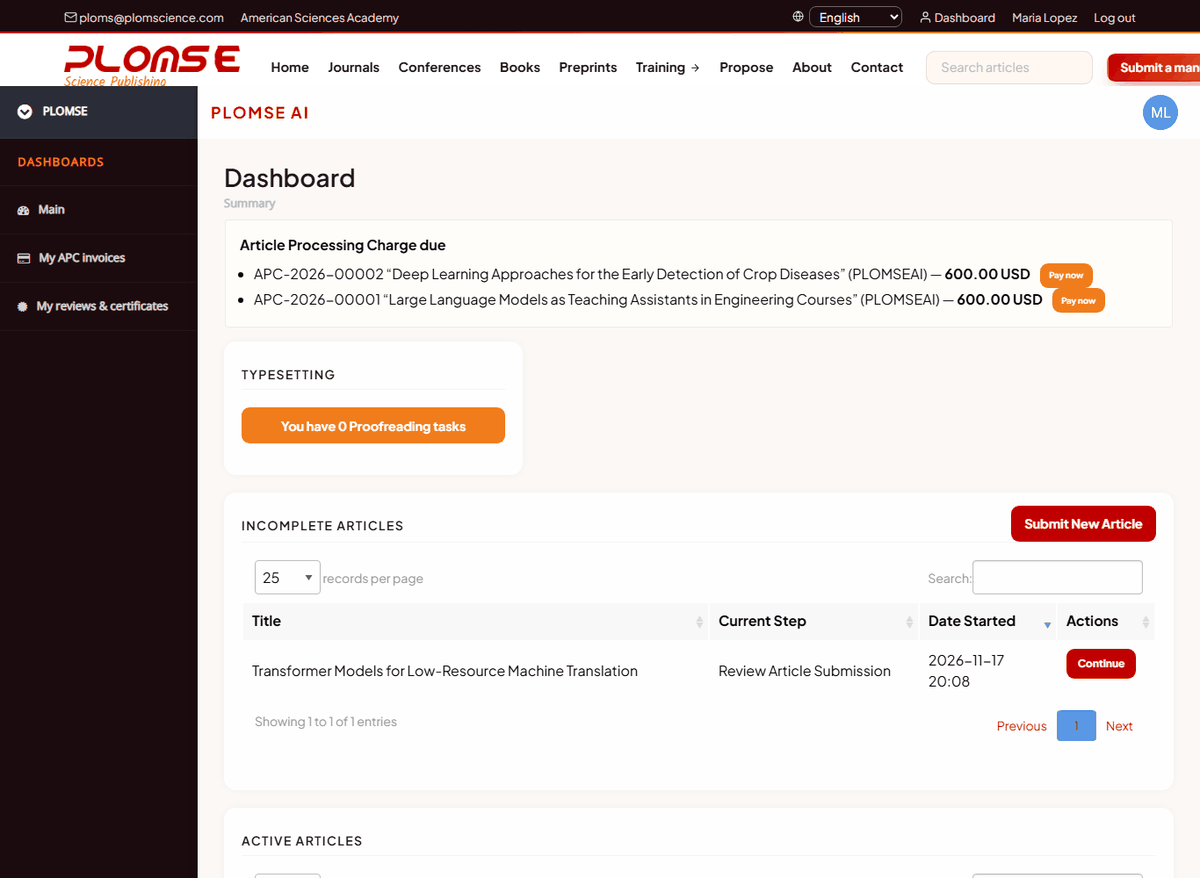
You can stop at any step. Your draft appears on your Dashboard under Incomplete Articles; click Continue to resume.
What happens next
- Editorial screening. An editor checks scope, formatting, ethics and similarity. Manuscripts that are out of scope or do not meet basic requirements may be declined at this stage (desk rejection), usually within a few days.
- Peer review. The editor invites independent reviewers. Most PLOMSE journals use double-anonymous review: reviewers do not see your name and you do not see theirs.
- Decision. Based on the reviews the editor accepts the paper, asks for minor or major revisions, or declines it. You receive the decision and the reviewers' comments by email and on your dashboard.
- Copyediting and production. Accepted papers are copyedited and typeset; you are asked to check the copyedited text and the proofs.
- Publication. The article is published open access with a DOI and is listed in an issue.
Track your submission
Open Dashboard (top bar). Under Active Articles each submission shows its Current Stage – for example Unassigned (waiting for an editor), Peer Review, Under Revision, Accepted, Copyediting, Typesetting or Published. Click View Status to see the details, the files and the message history for that article.
Respond to a revision request
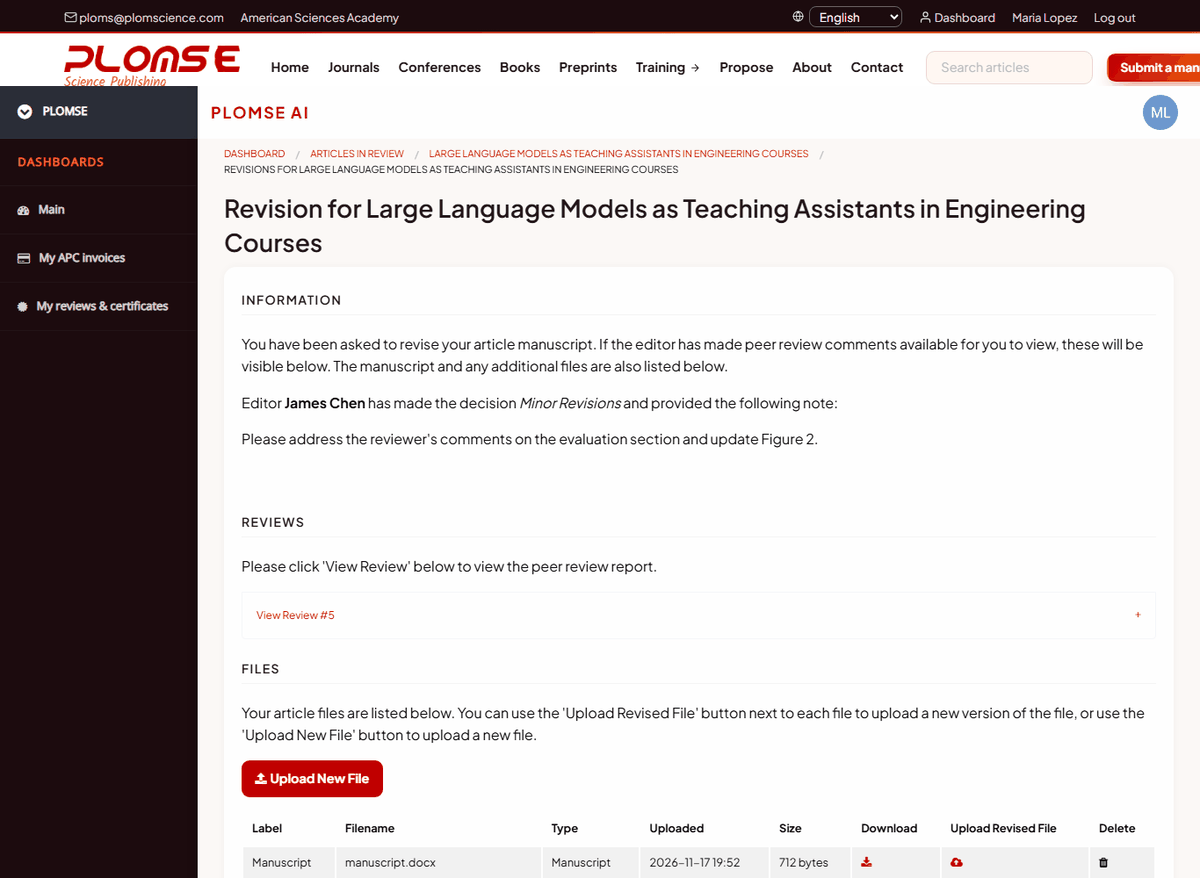
When the editor asks for revisions you receive an email, and a Revision Request link appears on your dashboard.
- Open the revision request. Read the editor's note and the reviewers' comments (reviews shared with you are listed with any reviewer attachments to download).
- In Files, click Upload Revised File next to your manuscript to replace it with the revised version (give it a label such as "Revised manuscript"). Use Upload New File to add new figures or a marked-up copy showing the changes.
- In Responses, write your Covering Letter to Editor and Response Letter to Reviewers, answering every comment point by point. Click Save Responses to keep a draft.
- When everything is ready, go to Finishing Up and click Submit Revisions (confirm when asked). The editor is notified and may send the revised version to the reviewers again.
Respect the due date
The revision request shows a due date. If you need more time, contact the editor before the deadline.
Copyediting review and proofs
- Copyediting review. After acceptance, a copyeditor improves language and style. You may be asked to approve the copyedited file: open the Copyediting Review link on your dashboard, download the file, upload a corrected version if needed, and accept or request changes with a note.
- Proofs. Before publication you may be asked to proofread the typeset article (PDF/HTML). Open the proofing task from your dashboard, check every page, list the corrections in the notes (or upload an annotated PDF) and click to complete the task. Only correct errors at this stage – no new content.
Article processing charge (APC)
Some journals charge an APC after acceptance; the amount is shown on the journal's Submissions page. If your article is subject to an APC, you receive an invoice email after acceptance, and an Article Processing Charge due banner appears with a Pay now link. The invoice page offers the payment methods that are enabled (card, PayPal or bank transfer with the invoice number as reference), a Discount code box and View / print receipt once paid. Your list of invoices is under My APC invoices. Waivers and discounts are granted by the editorial office – write to them before paying if you are eligible.
Publication
When your article is published you receive an email with the link. The article page has its DOI, PDF and HTML versions, citation formats and usage metrics. Share the DOI link – it is permanent. Your dashboard lists it under Published Articles with a View Live link.
Withdrawing a submission
To withdraw a manuscript, write to the editor (or [email protected]) with the article title and ID before it is accepted. Withdrawal after acceptance is only possible in exceptional cases.